
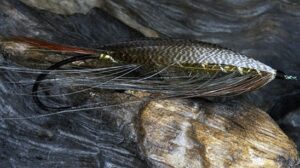
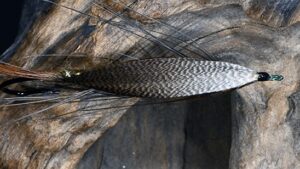
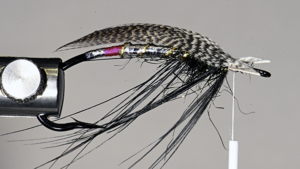
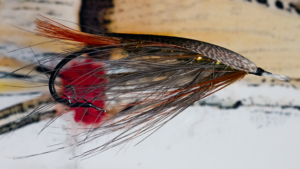
Fly tied by Vern Jeremica
Recently a friend was talking about mounting bronze Mallard wings on a Lady Caroline. I tried to give him some pointers over the phone and realized I had not done a very good job in explaining the process. So I went my fly tying bench and decided to write down a few pointers to send him in an email. When setting bronze Mallard, the fly tier does not always win and this was not my day. I just could not get them centered down the middle of the hook!
In an effort to analyze what I was doing wrong, I started to watch some YouTube videos. Well, all these talented tiers do an excellent job in demonstrating and they do make it look easy. The problem is subconsciously they are not talking about the techniques they are using to facilitate setting the wings in a consistent manner.
Then I decided to do a little reading. Recently, I had ordered John Shewey’s new book, “Spey Flies and their History and Construction”. The book does an excellent job in describing the various methods of mounting bronze Mallard wings, everything from a reversed wing technique to using a single bronze Mallard feather to create a roof type wing. The book has excellent examples of step-by-step procedures accompanied with photos for illustrations. I highly recommend this book. Any attempt to recreate any part of the book for an article for this newsletter is well beyond scope of this tier/author (and probably would run afoul of copywrite).
There are many resources via the internet, books and tying friends that can explain various methods for setting bronze Mallard wings. The trick is to find one you like and stick with it. But, there are several tips which can make your tying experience a little less frustrating. This article is not about how to set Bronze Mallard wings rather some tips that may help you win against Bronze Mallard.
Tips for handling Bronze Mallard feathers.
Getting quality material is key to limiting your frustration when tying spey type flies. Once you have good quality material the rest is understanding how the feather is to be used.
- Use a pair of matched feathers (one right and one left). They need to be very similar in size and shape.
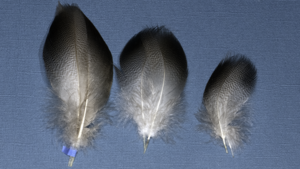
- There is only a limited section of the bronze Mallard that will be useable, attempting to use an entire feather for several flies ensures that the bronze Mallard will win every time.
- Removed the preferred section of feather with the stem (rachis) attached. Depending on whether you are going to use a single wing or a double wing, ensure all wing sections are the same size in length and number of fibers (barbules). If I am doing a double wing, I make the under wing slightly smaller
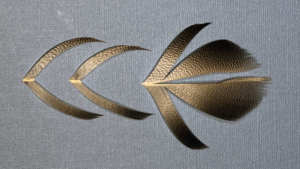
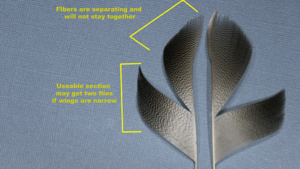
- Whether you decide to keep stem (rachis) attached or strip it away from the stem (rachis) the bronze Mallard must be tied in the “grey” section of the feather and as close to the base of the fibers (barbules) as possible. This is key to keep your wings together. (Hint: if you keep the rachis attached and the wings do not set right, and you keep trying until the point the wing is “messed up” you can always steam them to get them back to pristine shape)
- Make sure feathers are the proper length for the style of your fly. (You want your Bronzed Mallard wings to be size such that you are tying in the grey as close to the stem (rachis) as possible) Trying to make a feather that is too big or small is setting yourself up for frustration.
Tips for Setting Bronze Mallard Wings.
The key to learning and setting bronze Mallard wings is basically selecting a method for setting the wings. Whether it be a single wing, double wing, a single feather wing or any of the reversed wing methods. Pick one and practice, practice, and practice. For me the simplest to practice is a single wing: easier to control than 2 wing slips, and usually you can get two-three flies from one pair of match bronze Mallard.
- When setting bronze Mallard wings use a multistrand thread size 8/0 or 6/0. I find that using anything less than 10/0 can cut into the bronze Mallard fibers (barbules) and cause them separate. After the wings are set, something I will switch back to a smaller diameter thread.
- Make sure none of the fibers (barbules) are crossed. If they are, gently stroke the fibers and they should un-cross easily.
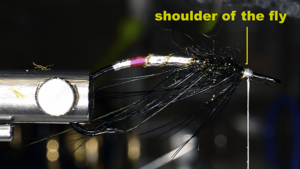
- Make sure the area where you are going to mount the wing is flat and at the shoulder of the fly. Any bump at this point will cause the wing to “kick” up.
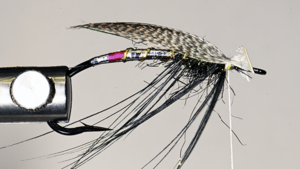
- Decide if you prefer an up-swept or a down-swept appearance for your of wing. I prefer the upswept appearance. When using this method, the curvature of the feather aids in creating a “tent” appearance. (Please note how close to the stem (rachis) the tie in point for the wings is.) The difference between the two versions is how you tie in the wing with it natural curvature. Tying it the wing with the curvature down (like and upside-down canoe) will set the with a lower profile. Tying it in with the curvature up, will cause it to set just a little higher.
- Mount the wings using soft loops, two turns no more than 3 turns. When tightening the soft turns pull straight up only, it is paramount you never pull in any direction other than up. After this point never, never take your tying thread toward the bend of the hook.
- Steaming your wings prior to mounting will prevent the fibers from being pulled out of place as well as lubricating the thread. A simple alternative to this is just use a bit of saliva at the tie in point for your wings.
- When varnishing the head do not use any of the UV products, these are only surface treatments. You need a penetrating finish; it aids in holding the fibers (barbules) together. You can use the UV products after you have used a penetrating finish
- To reduce cost and consumption of quality bronze Mallard, I have found when practicing using goose shoulders works well. Goose shoulders have very similar properties as bronze Mallard, they are soft, have a nice, curved shape, and compress very easily.
- To focus on setting bronze Mallard wings, yet still tying flies for fishing, tie up 5-10 flies and stop just before you mount the wings. Once you have the number of desire fly bodies tied, mount the wings one after another. Focus on doing everything consistently and make sure each fly is better than the last
- And don’t forget to enjoy the process!
An example of one of the flies tied at a Washington State Council FFI Event