Sep 2021
Quick Tip #1:
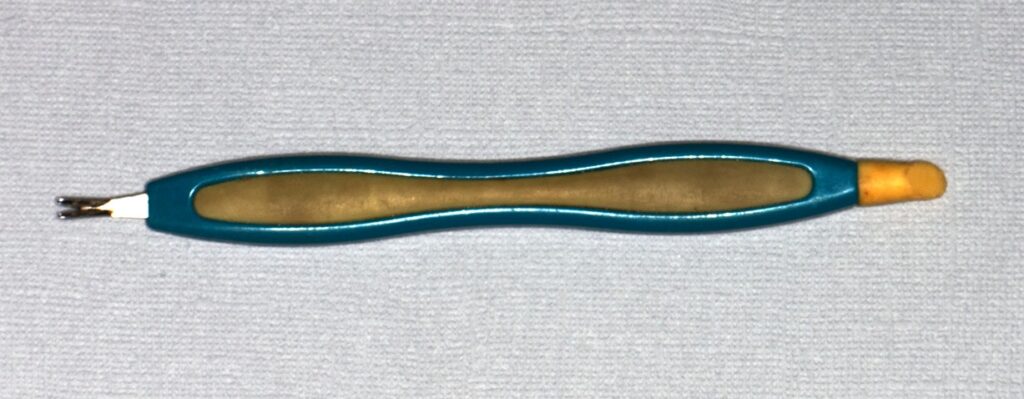
I have known some great fly tiers. One in particular was a perfectionist. He would not use a fly unless it was perfect. One tip he gave me was not to use scissors to cut the thread as it would leave a small tag which could be seen. Instead he used a straight blade of some sort such as an X-acto knife for a clean cut. (This is NOT the tip yet.) So I got an X-acto knife and used it for years. One day I was tying and I reached for some material. As I did something began to roll off my desk. I closed my legs to catch it, and I did. Unfortunately it was the X-acto knife. Four stitches later I was as good as new and a little wiser. Since then I have switched to a cuticle remover to cut thread. It works perfectly and is SAFE.
Quick Tip #2:
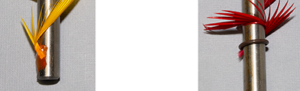
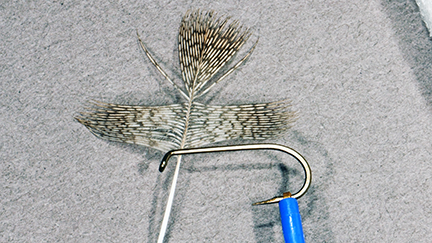
When showing a friend how to tie some parachutes dry flies, he was having a very difficult time splaying the tail fibers and keeping them splayed. A very simple fix is to use a loop of thread (or any other small diameter material) at the bend of the hook. Pull it from bend through the tail fibers to split them. To split the tail in half, run the thread evenly between the fibers. Then tie down the excess thread and you have a perfectly split tail.
Please note there are 3 tail fibers in this example. When you go to split 3 fibers, you pull the thread such that your loop straggles the center fiber.
Jan 2022
Quick Tip #3:
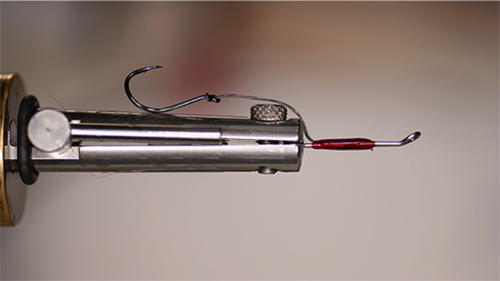
The 1st is for those who on occasion feel a little pain when tying any fly with a stinger hook. By utilizing a small magnet you can keep the stinger hook out of your way. The magnets can be purchased at most home improvement or craft stores. The size of the magnet is up to you. I personally like the 3/8 of an inch circular rare earth magnets, as they have a very strong magnetic field.
The picture below illustrates how I used to tie intruder type flies. But after 10-20 times catching the stinger hook, something needed to change.
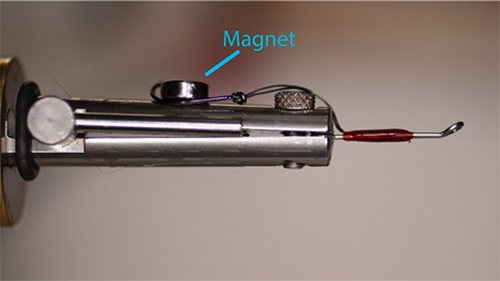
By utilizing a small magnet, you are able to keep the stinger out of the way. Please note, I have found trapping the stinger hook between the vise and magnet works great.
Quick Tip #4:
This next tip/trick can be used to change the look of dry as well as soft hackle type flies. With so many social media platforms, people are posting some truly beautiful flies. I have been asked how people can post pictures of flies with all the hackle fibers aligned so perfectly. Well, there are two reasons. One is to practice/tie a lot. Second, they are using different techniques to get a desired look. Below are two ways to hackle dry flies (And there are many more ways then these two approaches.)
The 1st method is just a typical way to hackle a dry fly. In this method, I have the dull side facing me.
The extra space on the hackle is there so that with your 1st wrap of the hackle you do not trap any fibers forcing them to go towards the rear of the fly. Each successive wrap is wrapped in front of the previous wrap.
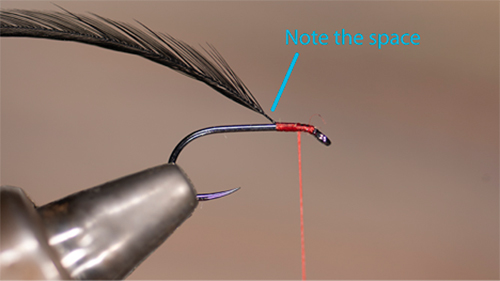
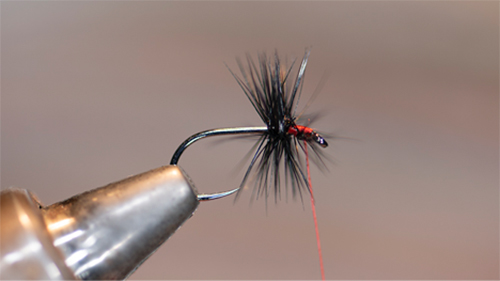
As you can see the hackle fibers are evenly spaced without any major problem.
April 2022
Quick Tip #5:
Usually, with trout flies, I tie between 6-18 flies of a specific pattern; so, material prep is a key factor in how consistent the flies are and how fast I get them tied. Recently, I was tying a bunch of “prince nymph” style flies for an upcoming trip. As I was preparing my biots for 24 “prince nymph” type flies, I decided to share this little trick I learned 40 plus years ago when I was a member of the California Fly Fishermen Unlimited club.
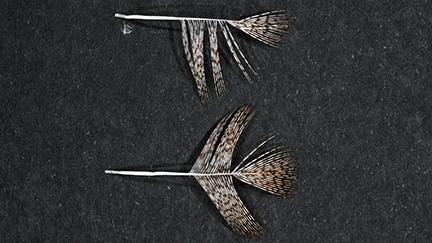
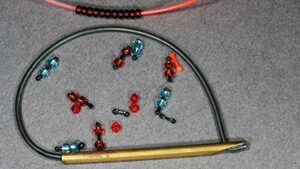
Managing biots on the quill can be a real pain sometimes. A simple solution is to wrap the biot around some sort of a dowel. You can use anything from a pen/pencil to a small steel rod. I attach the base of the quill to the rod with UV glue and then wrap it around the dowel. At the end of the quill, I use UV glue to attach it to the dowel. (You can attach the quill to the dowel in a number of ways… from using tying thread to o-rings.)
As you can see in the photos, the biots are splayed out. Now it is extremely easy to select the individual biots.
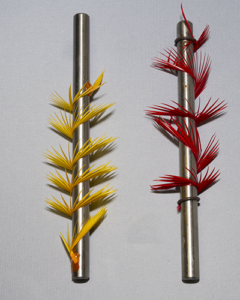
Two methods of attachment, UV glue and o-rings, are shown.
Quick Tip #6:
This next tip is about using a smart phone for improved photos of your master pieces. Today’s smart phones, which are remarkable pieces of equipment, enable anyone to be a good photographer! Having said that, here are a couple of ways to improve your pictures of the flies you tie.
A Suggestion – Purchase a vblog (aka vlog- video log) light, ranging in price from $10 to $100+. They make life easier to capture great pics. Here is my reasoning.
Photography is nothing more than managing light. (There is a little more than that; but, in simplest terms, if you control the light you will take great photos.) In an effort to control this light, before I started to use a blog light, I had to:
Work at developing an optimum light condition.
Move my vise to “stage” the photo.
Make sure the camera, light and subject matter were in predetermined positions (#1 above).
Then, move the vise to my fly tying table- if I were doing a step by step series on tying a particular fly.
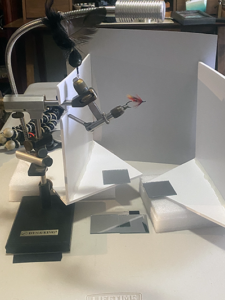
Above is my “stage”. Please note there are a lot of parts to this: a background, a light source, reflectors on the right and left of the fly to control shadows and brighten the subject, mirrors underneath the provide some backlighting.
My setup for using a vblog light.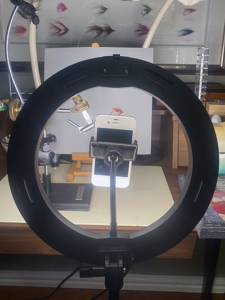
All I do is put the blog light in front of my vise and take a picture. The light source is in a ring configuration, providing a fairly even illumination of the subject. It takes about 1 minute to take a picture. The vblog light helps the camera to optimize the setting before taking a picture.
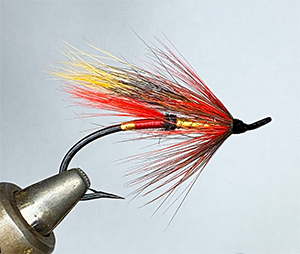
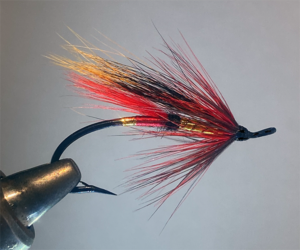
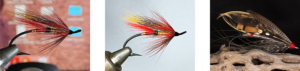
The image of the left was taken with a vblog light source while the one on the right was taken with “my stage” setup. Both photos received the same editing process. There was minimal software editing on both pictures. You can certainly spend time on editing the picture on the left. ( I was never able to get it to be as clear or as sharp as the blog light pic)
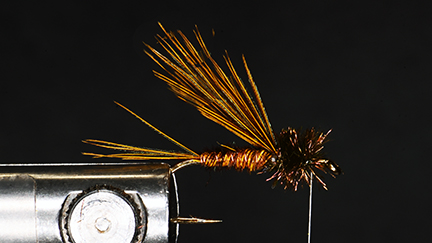
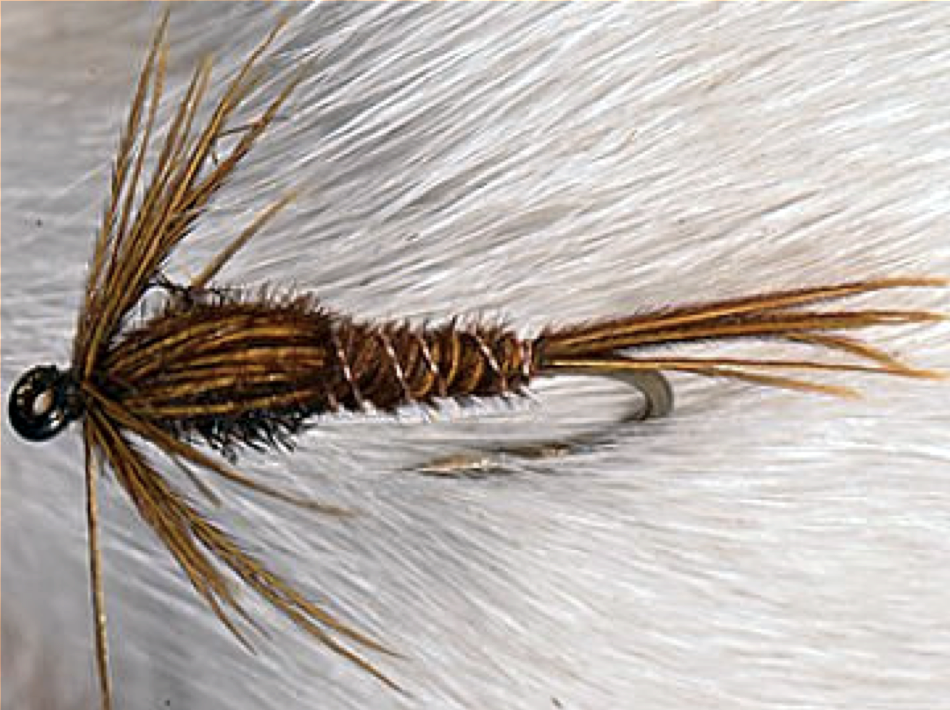
The fly above was tied by Harry Lemire and was one of his “fishing flies”
(All pictures for these articles were taken with a cell phone utilizing a vblog light source)
June 2022
Quick Tip #7: Easy Proportion Guide
For beginners and, for that matter, some advance tiers have problems in getting the right proportions for the flies they are tying. By placing on a clip, the 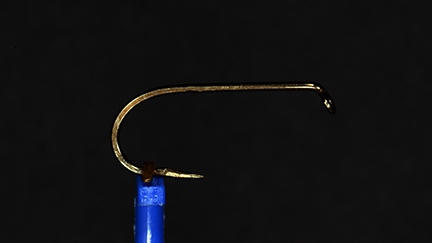 same size hook for the fly you are tying, you have a very simple and accurate gauge for measuring. When a pattern calls for a tail equal to body length, tie in the tail material and then measure it against the hook you have in the clip. So easy, it almost feels like cheating.
Quick Tip #8: Tying a Better Soft Hackle Fly
This next tip utilizes Quick Tip #1 to get a desired hackle length. For propose of illustration I have set the hackle length to be equal to the hook length. (Personally, I prefer 3/4 hook length for a soft hackle; but, that is not quite as simple to illustrate.)
Once we have the hackle of choice, we are ready to tie a soft hackle collar. The standard way to tie this hackle is by the tip, the feather tied in such that the fibers are concave face rearward and fold the hackle rearward as you wrap the hackle. This works plain and simple. One big disadvantage about this method, most people do not on make 1-2 turns but 3-4-5 turns and then fly becomes over dressed. (Remember, when tying flies, most of the time less is better.)
An alternative method is to strip the hackle fibers from one side of the hackle. Before you tie in the hackle, with the concave side facing away from you, strip off the fibers from the left side of the hackle. ( Left hand tiers, you strip off the fibers from the right side of the feather).
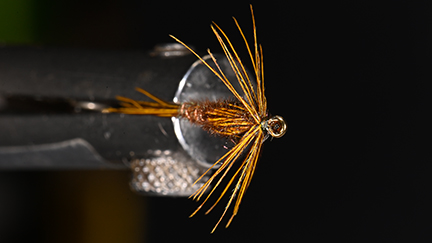
 At this point you tie in the tip of the hackle and wrap the hackle as you normally would. You do not have to fold the hackle fibers back because you are dealing with fibers already flowing rearward; plus, you have a fly that will not be over dressed even if you make extra turns. This method is much simpler, faster and creates a neater fly than the conventual method.
(Note: If the pattern calls for two turns or for that matter 1 1/2 turns using the conventional method, with only half as many fibers, you will have to make 4 turns or 3 turns using this tip hackle fiber method)
Quick Tip #9:A Simple Way to Create Nymph Legs
Recently I was watching a group of beginning tiers getting some instruction at a local store. The gentlemen teaching the class was very skilled and doing a great job. The class was tying a mayfly type of nymph. After they made the wing case, they were then instructed to tie in some pheasant tail fibers for legs on each side of the thorax. Well, it was interesting to see the varying legs size among the students as well as how the legs sizes varied on the same fly. Most were struggling with this method.
After the class, I spoke to the gentlemen about an easier method for tying in nymph legs. He listened and agreed it was an easier method and he wished I would had said something earlier. (The instructor mainly ties salt water flies and does not tie that many nymphs)
A simple method of creating legs on nymphs.
 When getting ready to create a wing case, we are going utilize pheasant tail fibers to create both the wing case and legs for the nymph at the same time.Strip off about 20-23 fibers of fibers for a pheasant tail, the amount of fibers will vary with the size of the nymph you are tying. On really small sizes #16-#20, you may only need 6-8 fibers.
The art of this method is to make the pheasant tail fibers the proper length for creating a wing case and legs. A good starting point is to have the length of the 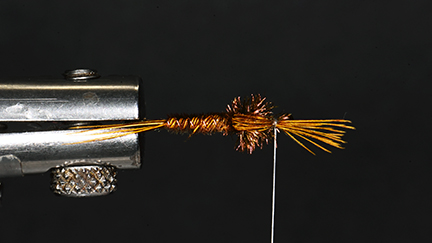 pheasant tail fibers extend to the midpoint of the tail. Now pull the wing case material forward and make a few turns with your thread. The pheasant tail fiber should be facing forward.
Now all you do is separate the pheasant tail fibers into two groups, then force the fibers rearward keeping them separated on each side of the hook, make a few turns of thread to hold them in place and whip finish the fly.
You can adjust the length of the legs by where you reference the tail!
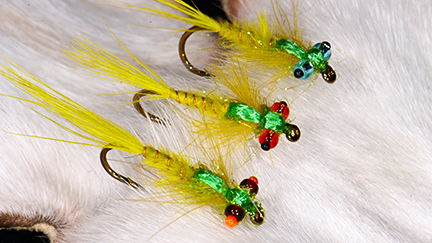
Quick Tip #10: Glass Bead Eyes
Would you like to add a little bling to your mono filament eyes for damsels or caddis flies? Here’s an old trick to make very inexpensive eyes for large or small flies, using craft store variety plastic or glass beads. Besides making a good looking fly, the beads also give a bit of weight to fly.
The size of the eyes you make depends on the size of glass/plastic beads you are using. In this example, I will be concentrating on small flies. The process is the same for larger size eyes used in saltwater type flies.
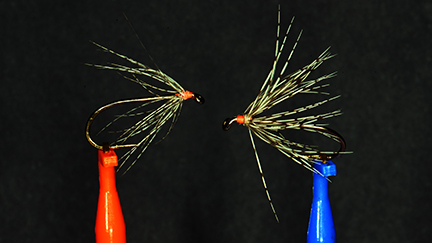
The example below uses an 11/0 Black glass bead with 40 lb Amnesia monofilament. You can vary the bead color/ monofilament color to achieve a variety of effects.
The chart below is reference guide in choosing bead size. As to color, choose what attracts you and then experience will tell you what color attracts fish. At the end of the article, you will see the same fly with three different color beads and two different color lines.
| Bead Size | Size in mm | Hook Size |
| 11/0 | 2.2 | #8-#10 |
| 12/0 | 2.0 | #10-#16 |
| 15/0 | 1.5 | #14-#20 |
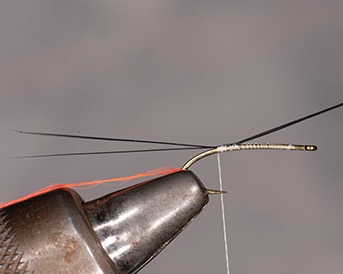
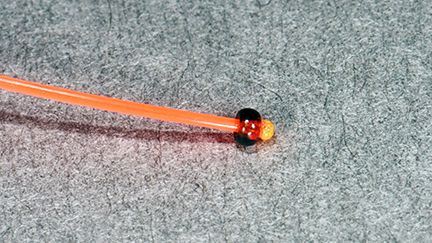
Step 1: Using a flame source like a Bic lighter, melt an end of a 6 – 12 inch piece of monofilament. Slide a glass bead onto the monofilament and ensure that the melted monofilament ball is large enough to ensure the glass bead does not fall off. The critical point here is to size the monofilament as compared to the size of opening in the bead. Pick a bead size that barely can be threaded onto the monofilament.
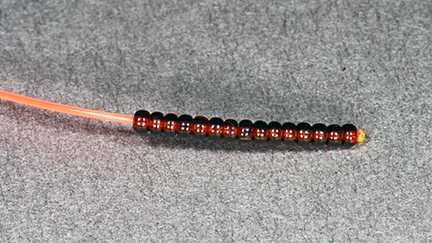
Step 2: Begin threading glass beads onto the monofilament. It is more efficient to place all the beads for several sets of eyes on the monofilament at one time. To be extra safe, on your first attempts, you may want to melt a stopper ball at the other end of the line. Please note, using black glass beads and a color monofilament creates eyes that are somewhat black but with an orange cast. If you wanted pure black, use black monofilament or a black bristle from a broom.
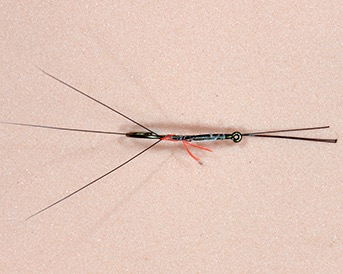
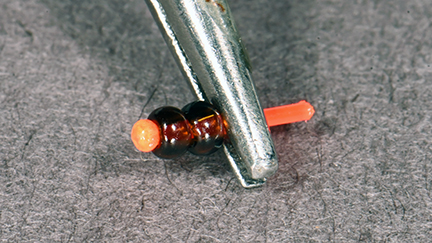
Step 3: Using a pair of forceps, clamp the monofilament two glass beads up from the melted ball and cut the monofilament with about 2 mm of exposed line. At this point, the forceps will prevent the glass beads from sliding off the monofilament. You need to create a melted monofilament ball on the monofilament with all the strung glass beads. Once this is completed, create a melted monofilament ball on the eyes you separated with the forceps. The space between the eyes is approximately 3 times the diameter of the hook. The spacing depends on the size of the hook and the type and amount of the material you are wrapping. You may need a couple of attempts to perfect the correct spacing.
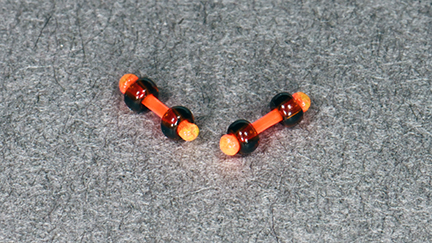
At this point the eyes are ready to be used. One possible enhancement is to use several coats of UV resin for a more finished look. Typically, I only use this enhancement for larger flies.