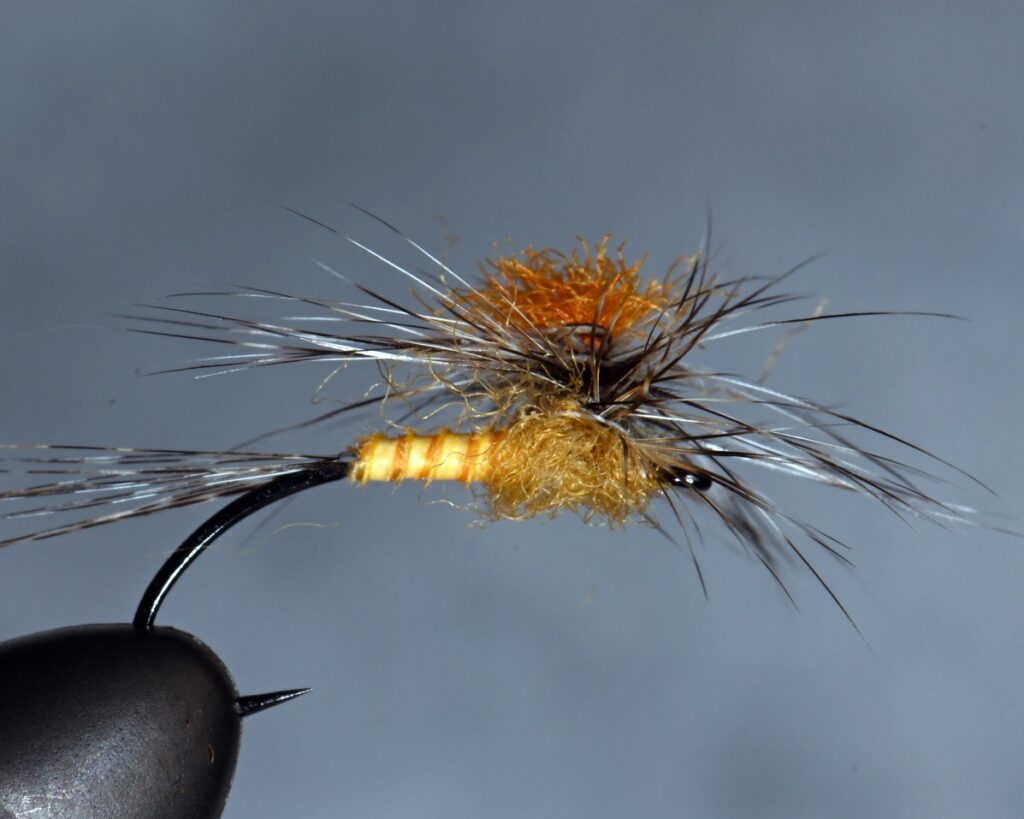
Biots, the little short stiff barbs on the leading edge of a bird’s flight feathers, is such a misunderstood material. Most people are familar with biots as split tails on stoneflies or wings on nymphs such as the Prince nymph or a caddis emerger. However, they can be a little difficult to work with but by properly preparing the material it is easily managed. Biots can yield some very striking natural looking segmented bodies that have a natural taper. Depending on how you secure the biot to the hook you have options of a smooth body segmented body or a body which has a “natural” rib.
All birds that fly have biots, some biots are more usable than others for fly tying. The 3 most common boots are turkey , goose and duck. The critical difference between these three biots are their length.
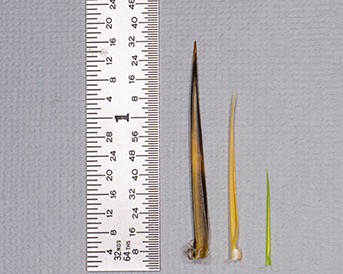
Biot closest to the ruler is a Turkey, followed by goose and finally a duck.
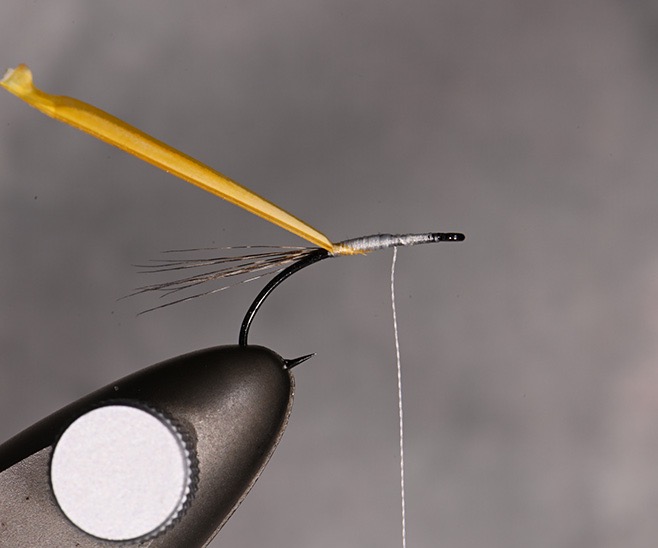
Please note the “notch” at the base of the Biot, the orientation of this notch will define whether you get a ribbed body or a smooth.
From my experience:

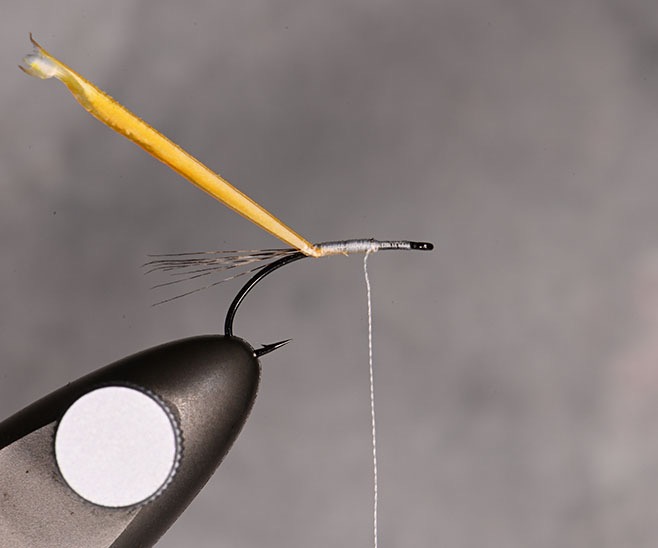
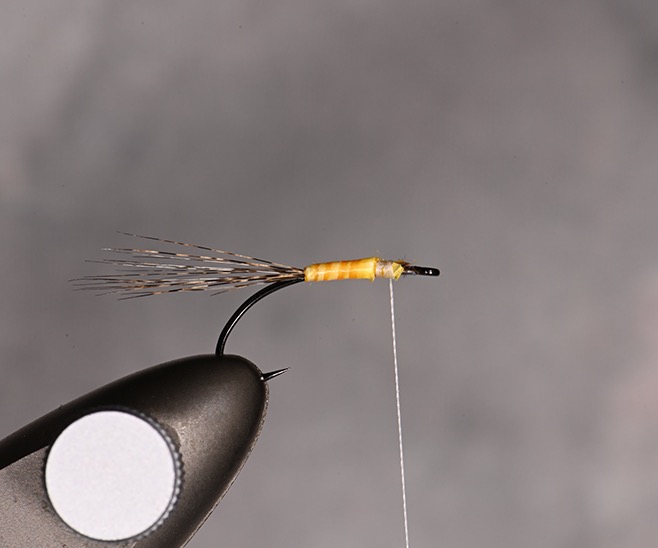
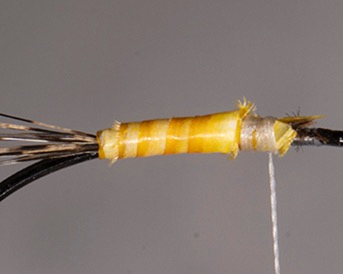
The most difficult part of tying biot bodies is securing the biot to the hook. Once this is accomplished, it is just a matter of winding the biot body. ( If you have a rotary vise, use it. Most tiers will get a more consistent body) Start with a good even thread base wrapping back from the eye of the hook to the point of the hook. Orient the biot such that as you tie it in on the near side so it extends away from the hook at about 45 degrees. Depending on the body type orient the notch. If the notch is oriented towards the front of the hook, you will get a ribbed body. If the notch is oriented towards the rear of the fly you will get a smooth segmented body.
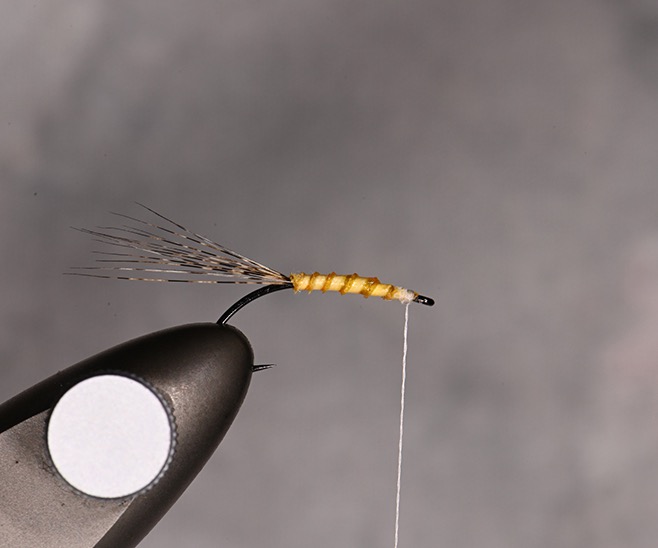
Secure the butt of the biot (notched end) with a pair of hackle pliers and slowly begin to wrap the biot. It is critical to ensure you do not get a twist in the biot. If you do you will not get the body type you were expecting. After your 1st wrap, the notch must be oriented in the direction at which it was tied in. Wrap forward overlapping the previous wrap, adjusting the overlap to define your segmentation. Continue wrapping forward until you come to your tie off point. Make a couple of extra wraps and cut off the excess material.
Below are a few pictures to illustrate this process.
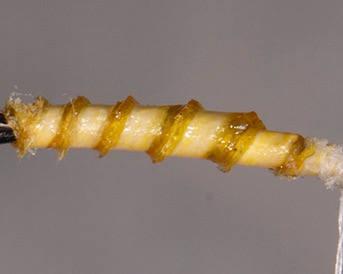
Note Notch is facing forward.
Note Notch is facing away for the eye.
A couple tips to make tying biots easier:
- Moisten the biots however you desire. (water, saliva, sponge, etc) This makes handle the biots much easier. (If you want to put a finish on the biots, (UV resin, Zap a Gap, etc) You need to make sure the biot has dried. I use a small hair dryer for about 15-30 seconds.
- If you want to add strengt h to the biot body, without drying the biot use a water base head cement.
- A smooth thread base is essential for achieving a uniform and consistent body.
- Lastly, pull the biots off of the feather. If you cut off, you loose your reference, the notch.
Hopefully, we will be able to share more pearls of wisdom, leading to better flies, more bites and greater stories.